14 months with the MLD Trailstar
Much has been written about the Trailstar, and at several points over the last year I’ve asked myself if the world really needs another Trailstar review. It’s a known quantity now. Some in the backpacking world have already moved beyond the Trailstar to other shelters entirely. But my year using this unique shelter has taught me so much about lightweight backpacking, transformed my experience in the mountains so profoundly, that I can’t help but write about it.
For all the Trailstar’s wonderful qualities, it isn’t a perfect shelter. I have now spent over 60 nights beneath it, which I think is enough to view it with the proper objectivity to write a review.
Throughout this review, I will be referring only to the SilNylon version of the Trailstar. I have not used the cuben version.
What the Trailstar is and isn’t
What it is:
- It’s a shaped tarp manufactured by Mountain Laurel Designs in the USA. MLD is a small outfit run by experienced backpacker Ron Bell. The company specialises in equipment for lightweight backpackers, and for various reasons MLD has a loyal following in the UK. Although their gear is lightweight, it’s often ideally suited to the tough conditions on the British hills – and out of their entire catalogue, the Trailstar is perhaps the best example of this.
- It is lightweight but not, arguably, ultralight by current standards. MLD currently lists the Pro SilNylon Trailstar at 510g.
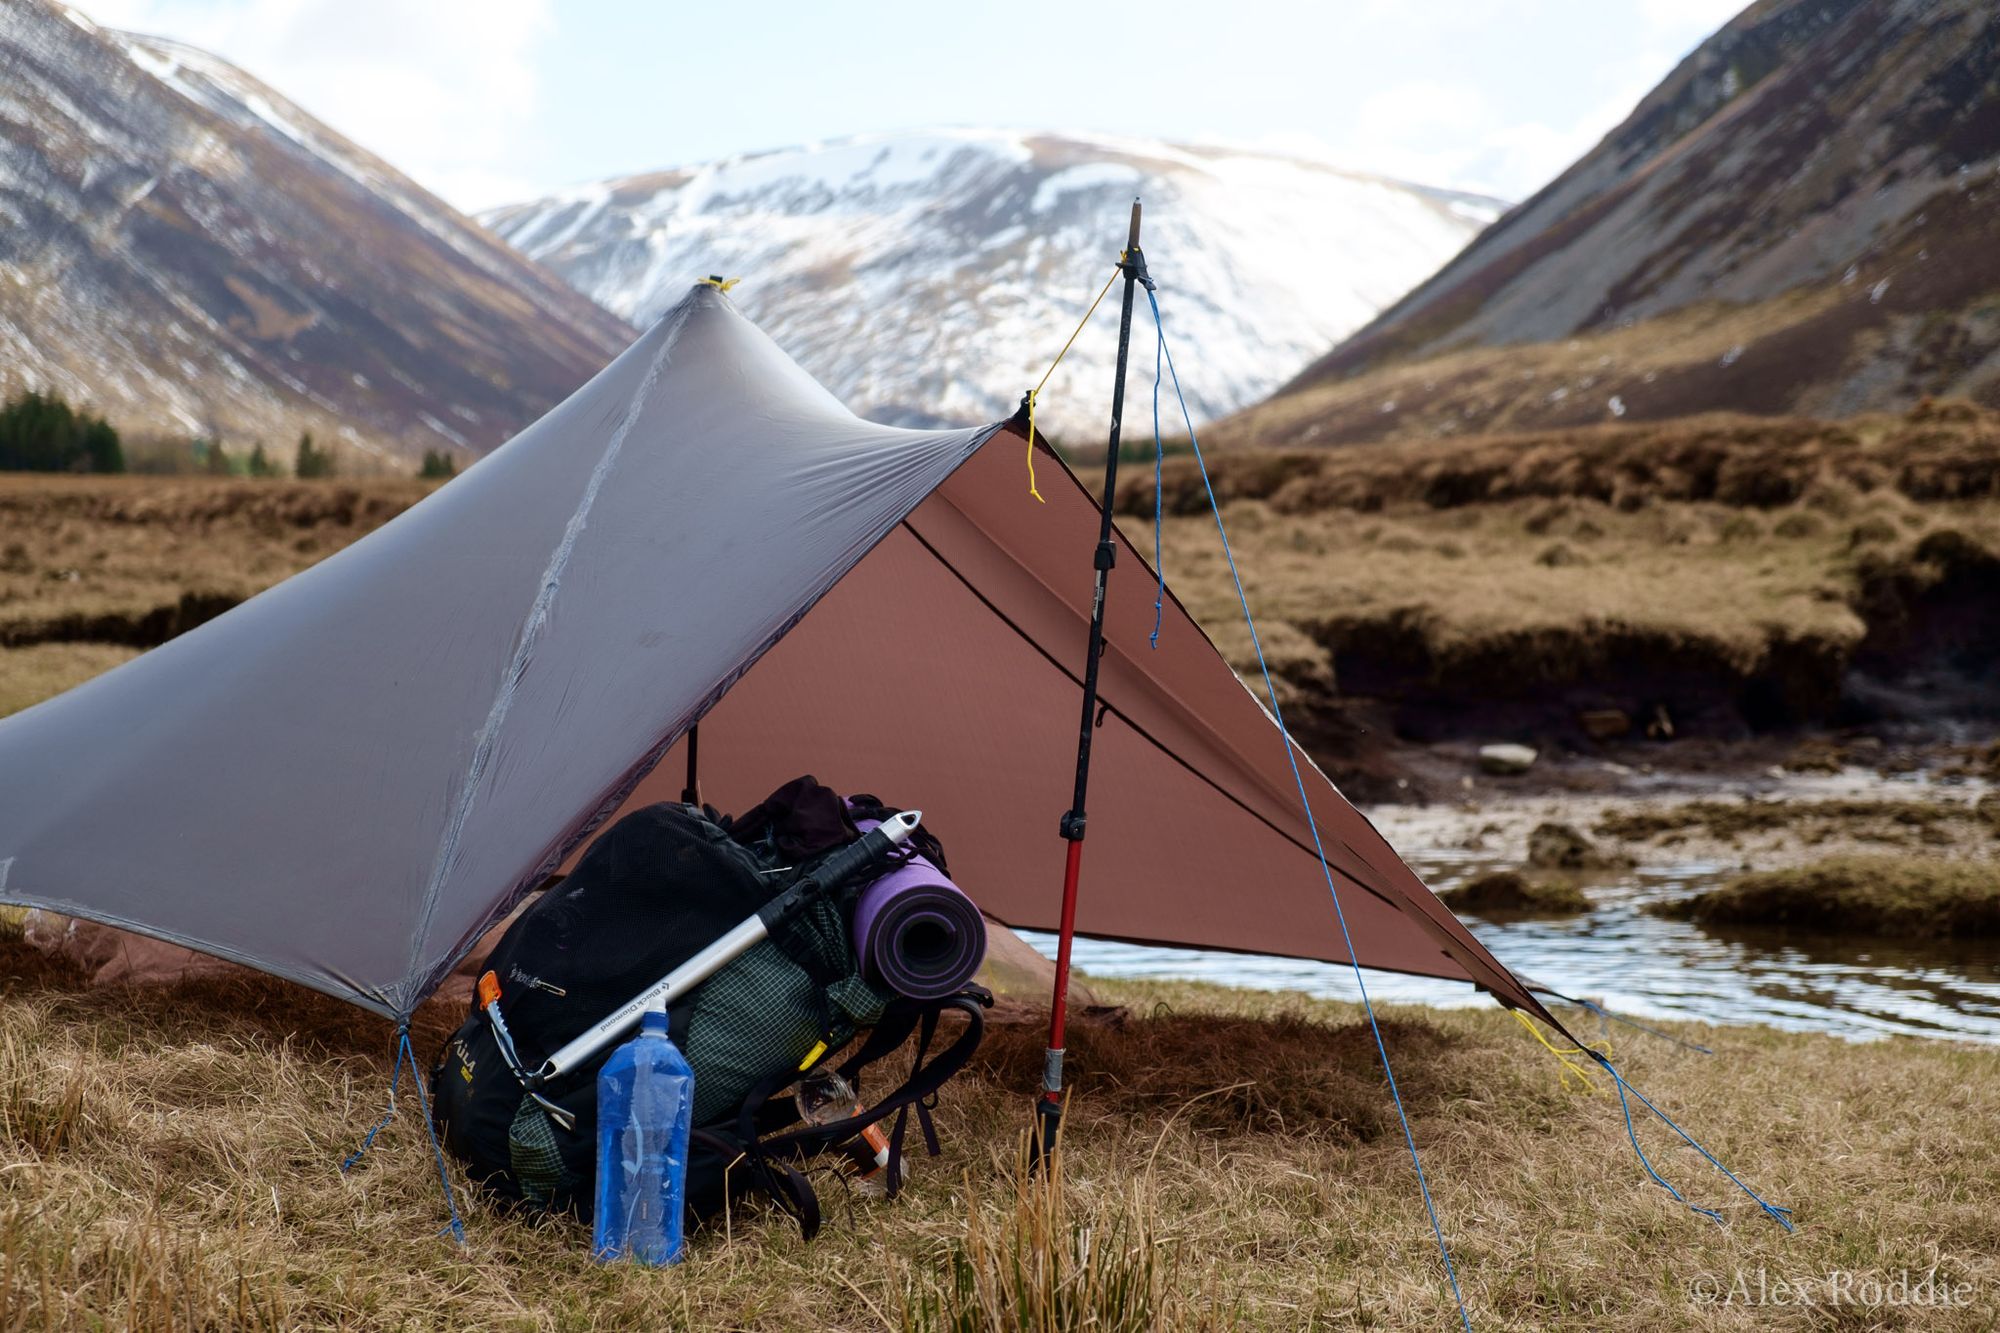
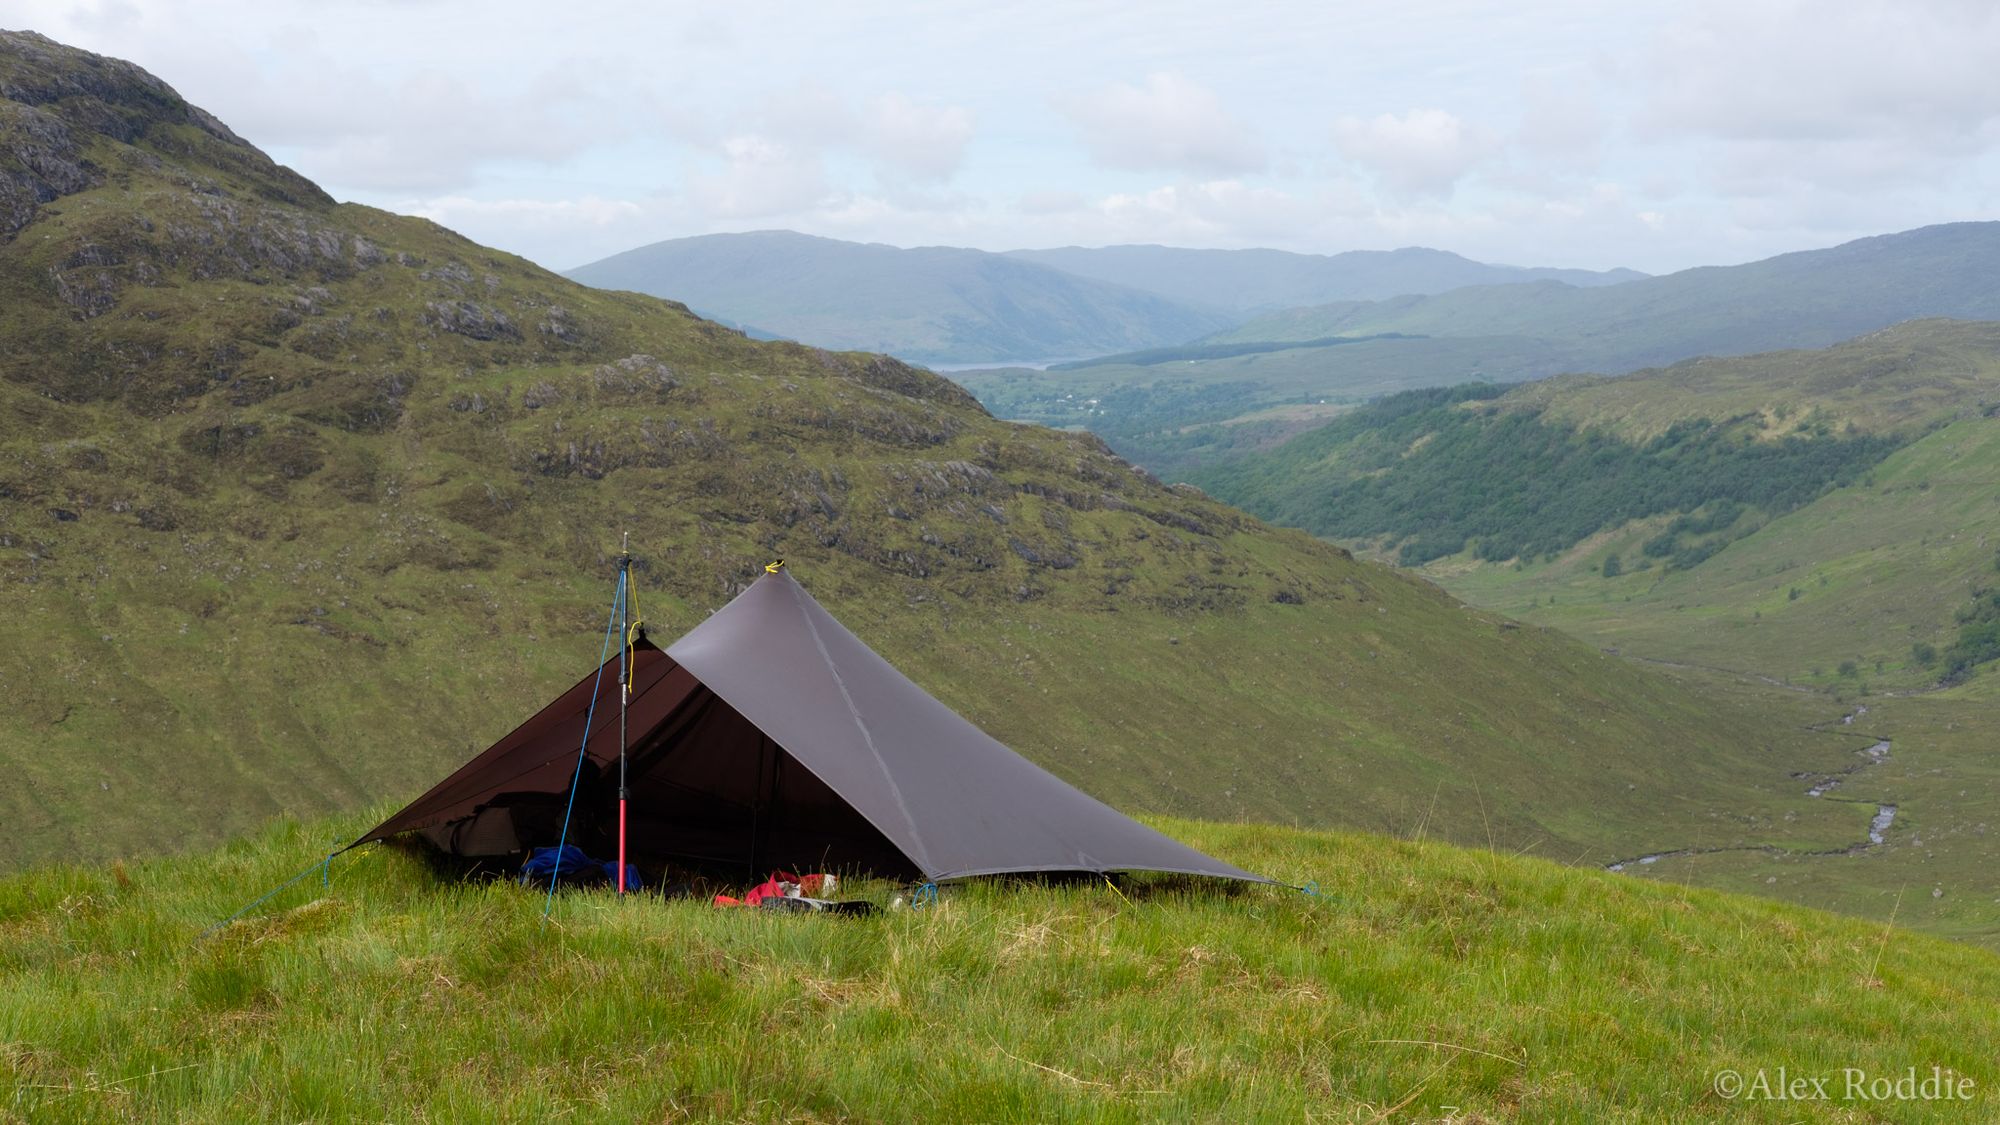
- Unique amongst tarps, the Trailstar is pentagonal. This means there are several possible ways to pitch it. Although it isn’t as adaptable as a flat tarp, it offers significantly better weather protection.
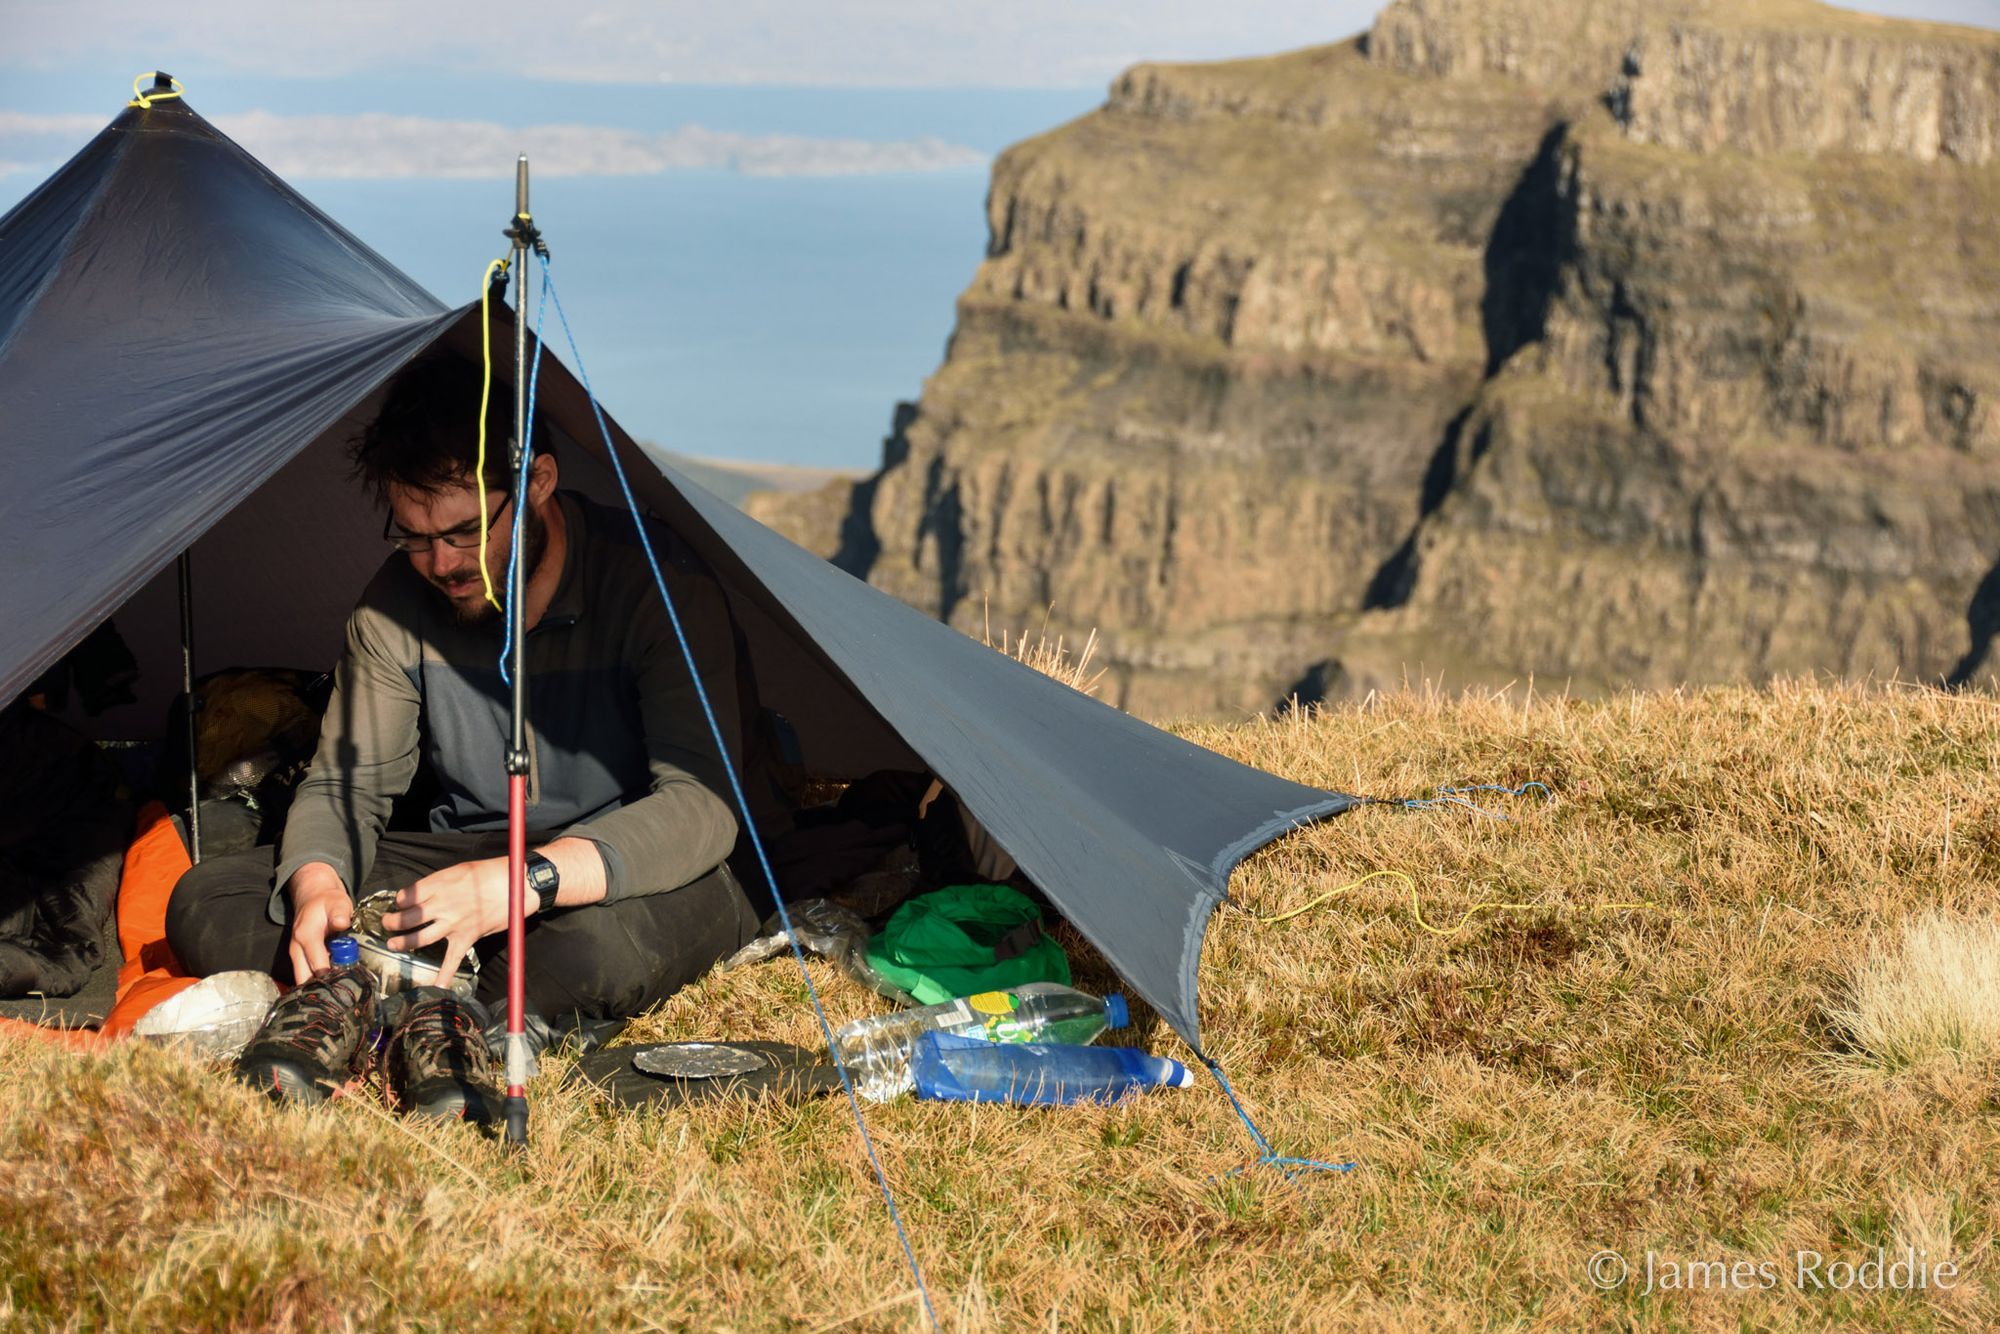
- It’s also huge. MLD advertises it as a three-person shelter, and while I believe that’s optimistic, it’s comfortable for two plus gear. It’s perhaps most commonly used as a massive one-person shelter.
- Like an ordinary rectangular tarp, the Trailstar is incredibly simple. There are no zips, buckles or snaps to break or wear out. It’s fitted with ten linkeloks: five on the corners, and five mid-panel points. It’s up to the user to fit guys to their requirements (cord is supplied).
What it isn’t:
- It isn’t a fully enclosed shelter. Due to its geometry, it’s impossible to pitch the Trailstar flush to the ground on each side. The standard pitch most people use leaves a triangular entrance on one side; it’s usual to pitch the Trailstar with this entrance facing away from the prevailing wind.
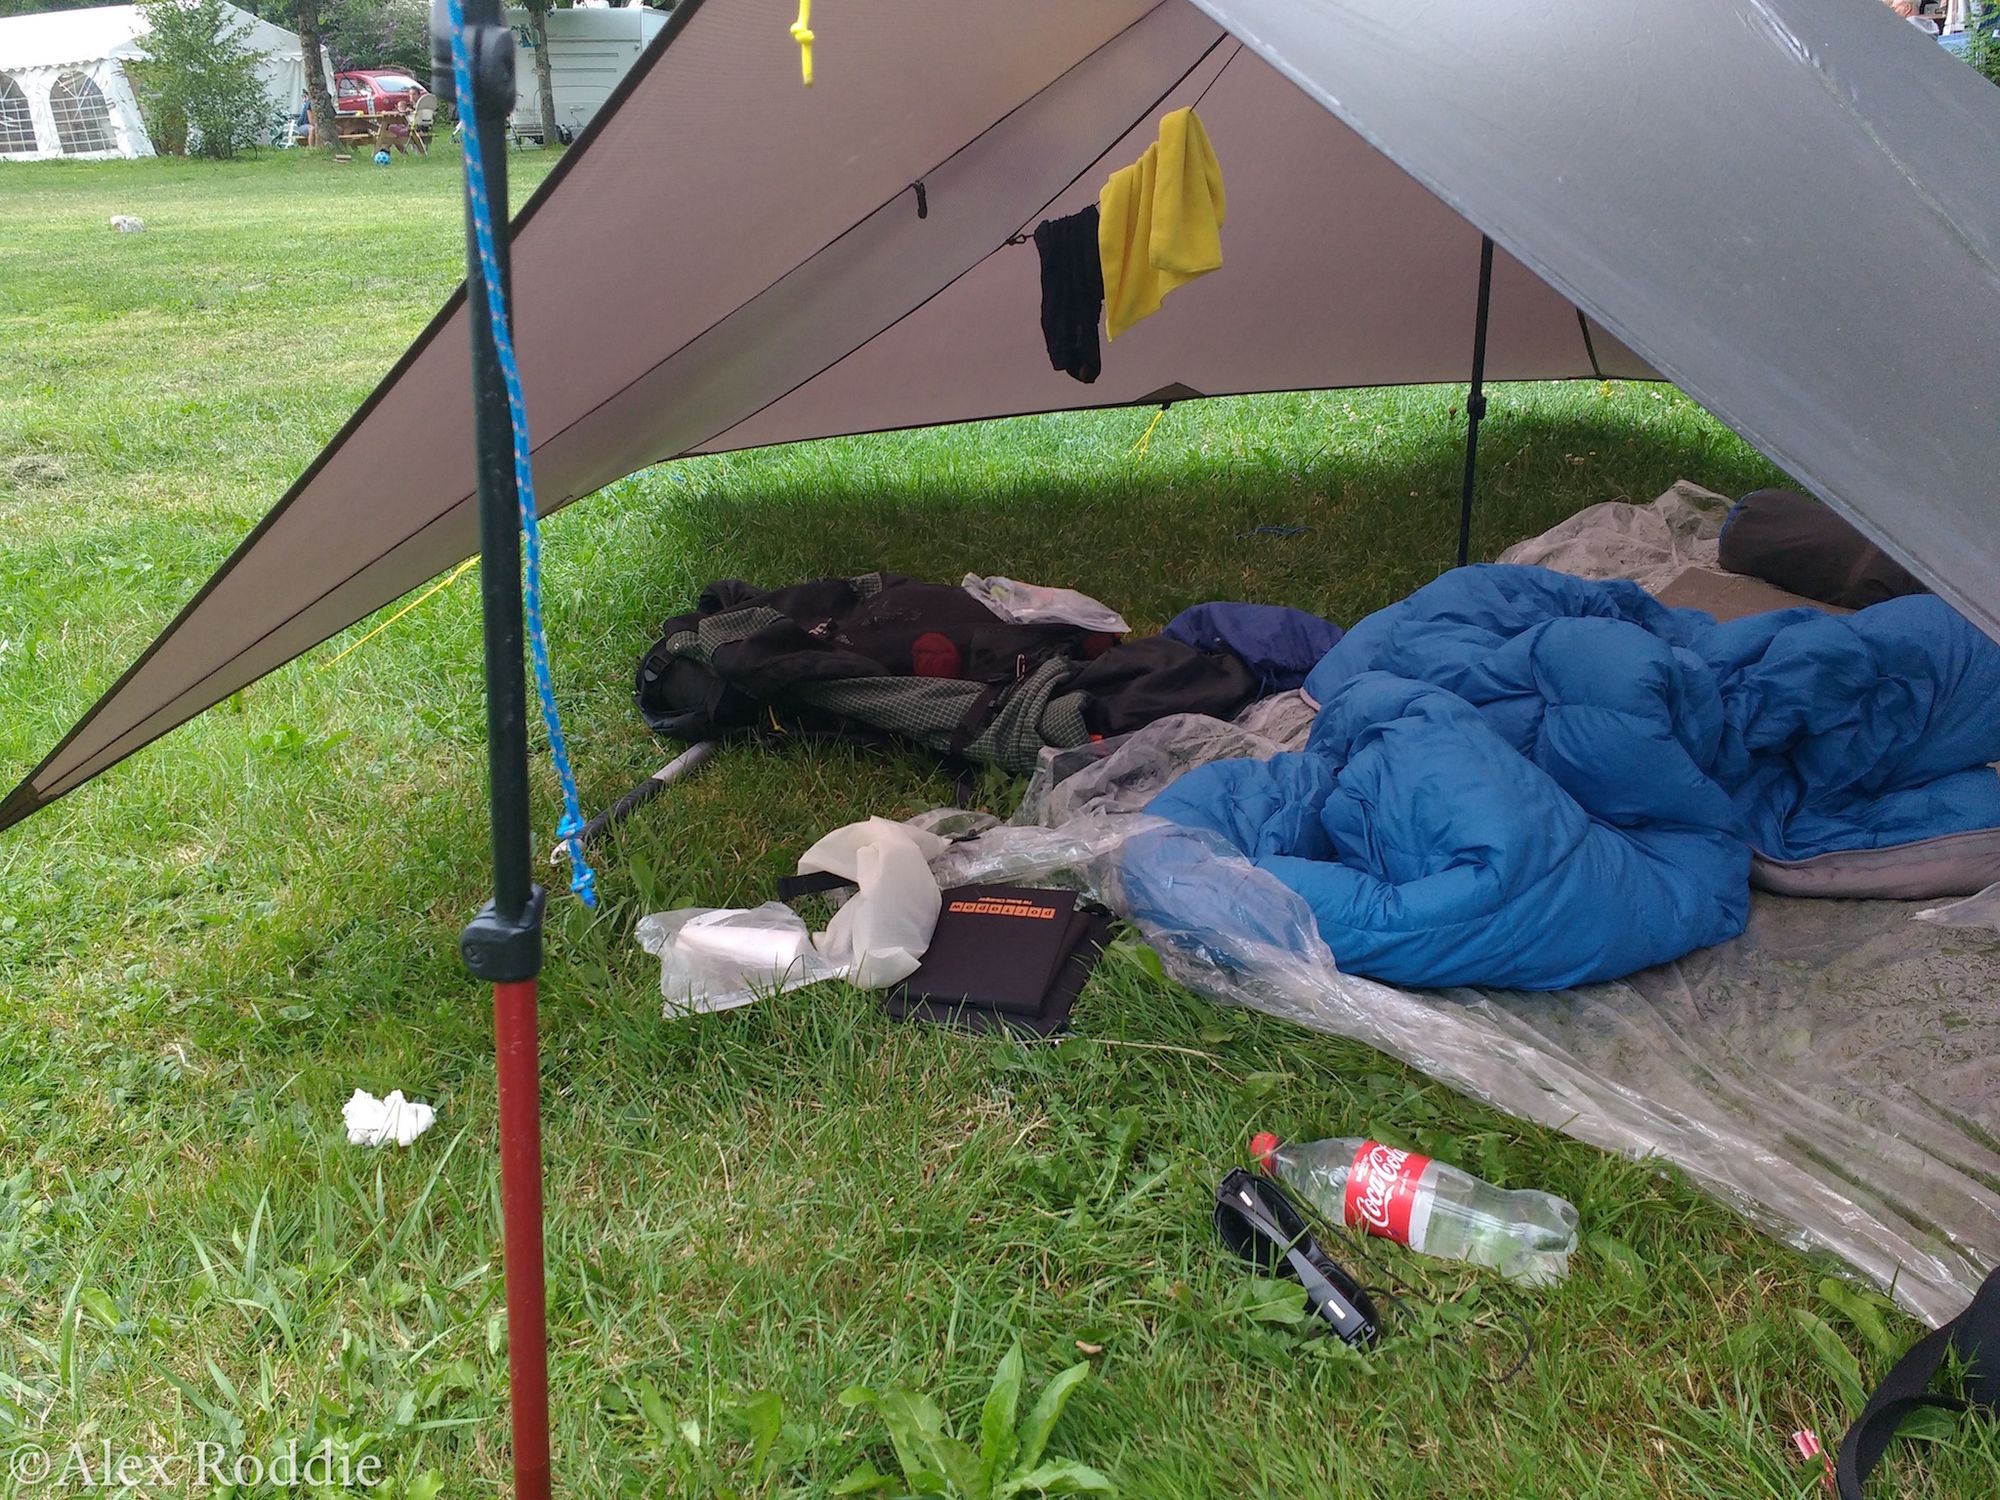
- It isn’t a tent. The beauty of tarping is that you can use whatever you need under the canopy: just a sleeping bag and groundsheet, a bivy bag, a mesh nest, or a full inner.
- Despite its legendary weather resistance, it isn’t a four-season shelter. People use Trailstars in winter, but there are better options for windy snowstorms with lots of spindrift.
- It isn’t a small shelter. The Trailstar requires quite a large pitch to set up. As we’ll see, this isn’t necessarily a disadvantage.
My Trailstar experience
I ordered my Trailstar from MLD in April 2016, just before setting off on the West Highland Way and two other big hikes in the Highlands (280 miles altogether).
The variant I ordered was the ‘brown’ colour of SilNylon – very dark brown, almost black in some light. At that time MLD did not offer a seam-sealing service, so I had to seal the seams myself (this is standard on most sil shelters from cottage manufacturers). MLD include a tube of silnet with every shelter purchase. I always do a sloppy job of seam sealing but it works.
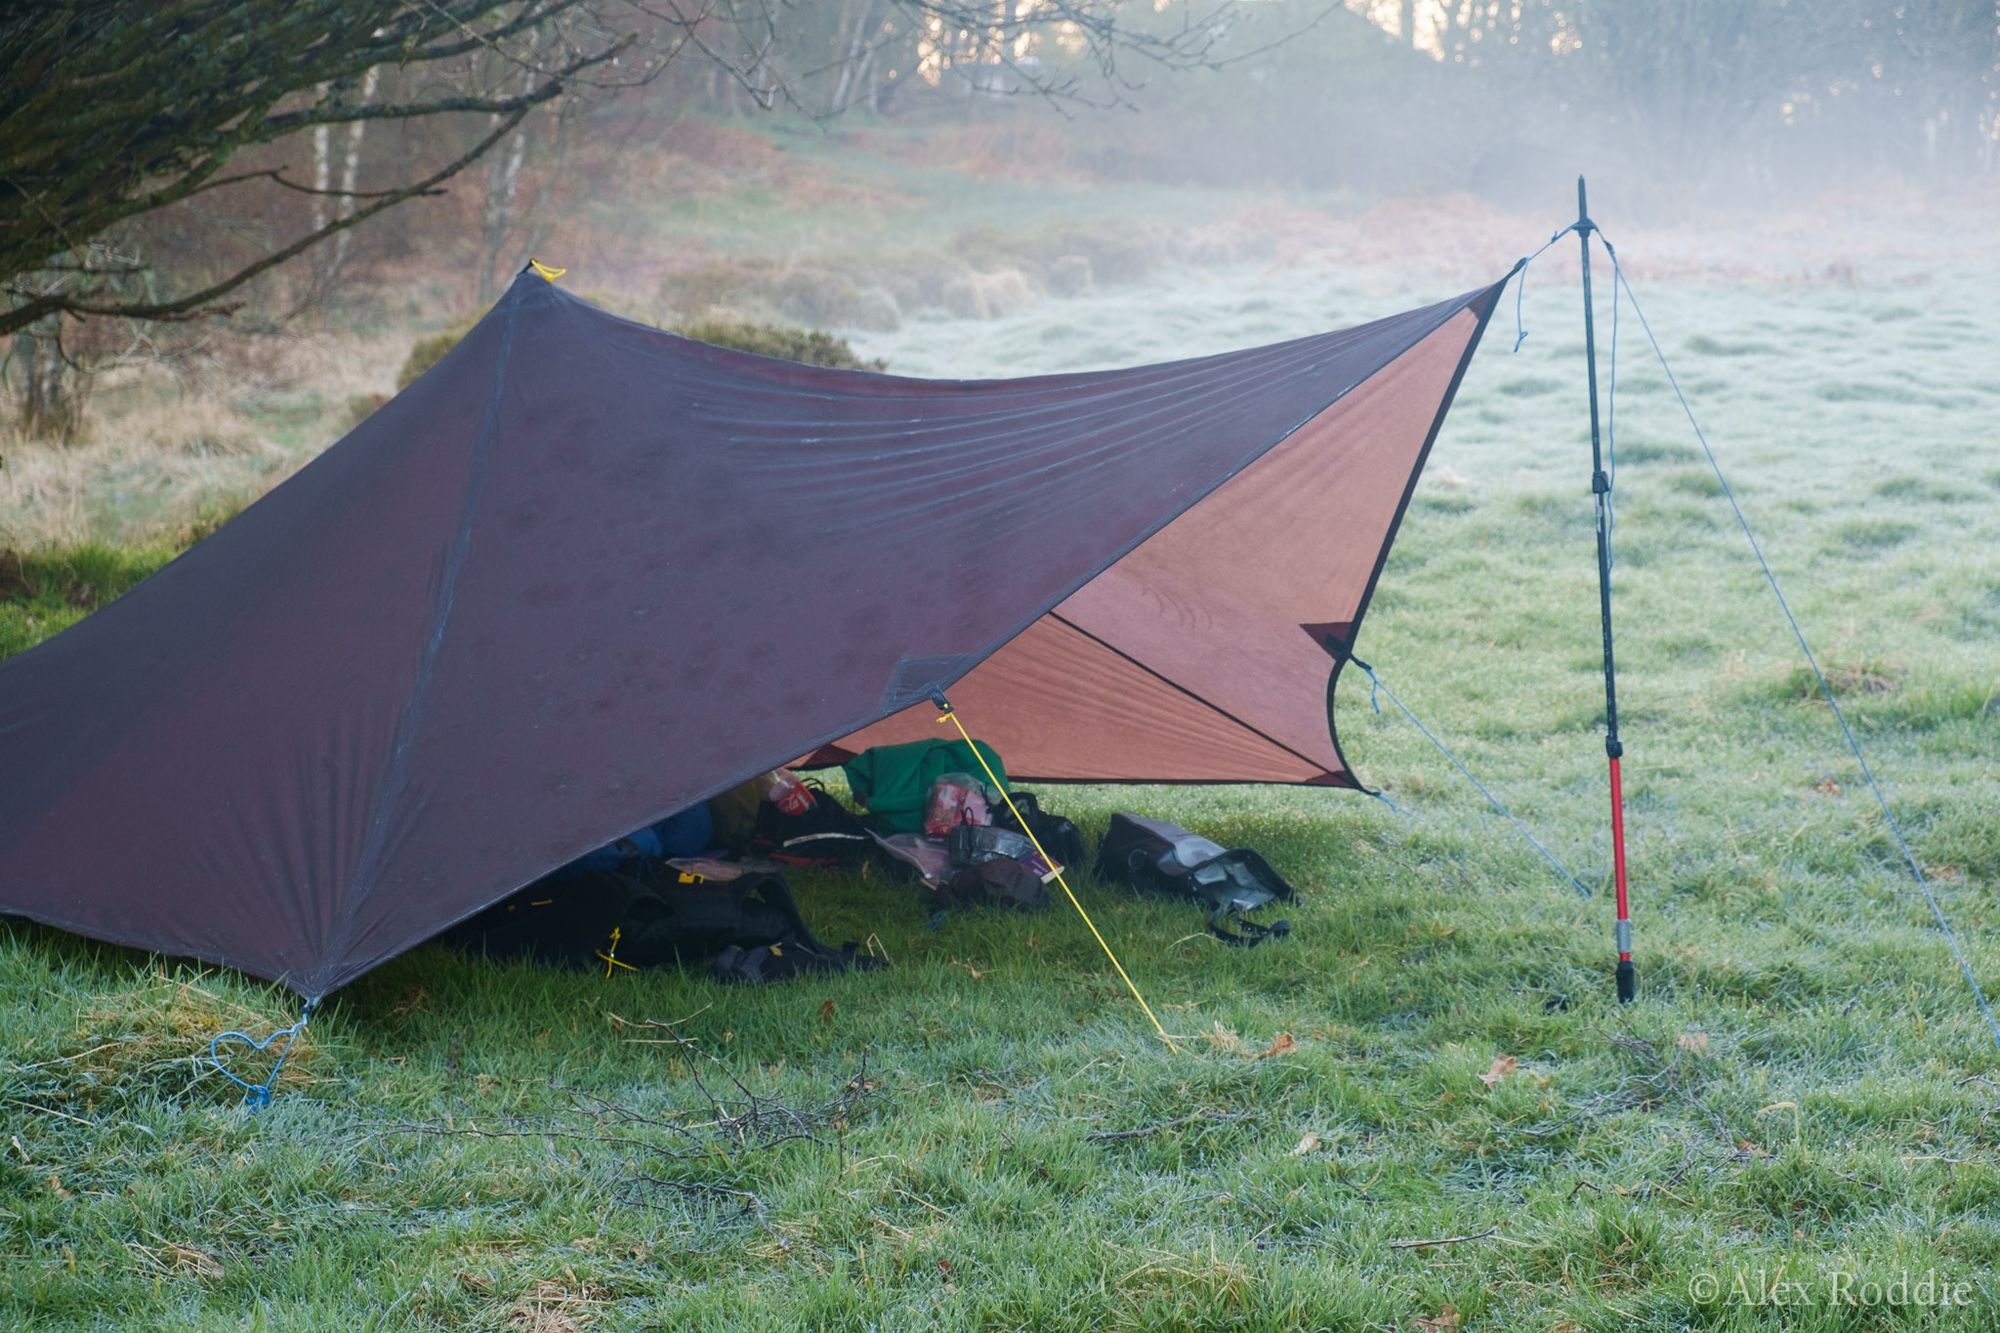
My first pitch in anger was on day one of the West Highland Way. It was a frosty night. Waking up to see the woods through the entrance of my shelter was quite an experience – although I’ve used bivy bags for years, and have extensive experience with ordinary flat tarps, this was the first time I’d used an open shelter that felt so secure against any weather. It felt like the best of both worlds. I loved it right from that first moment.
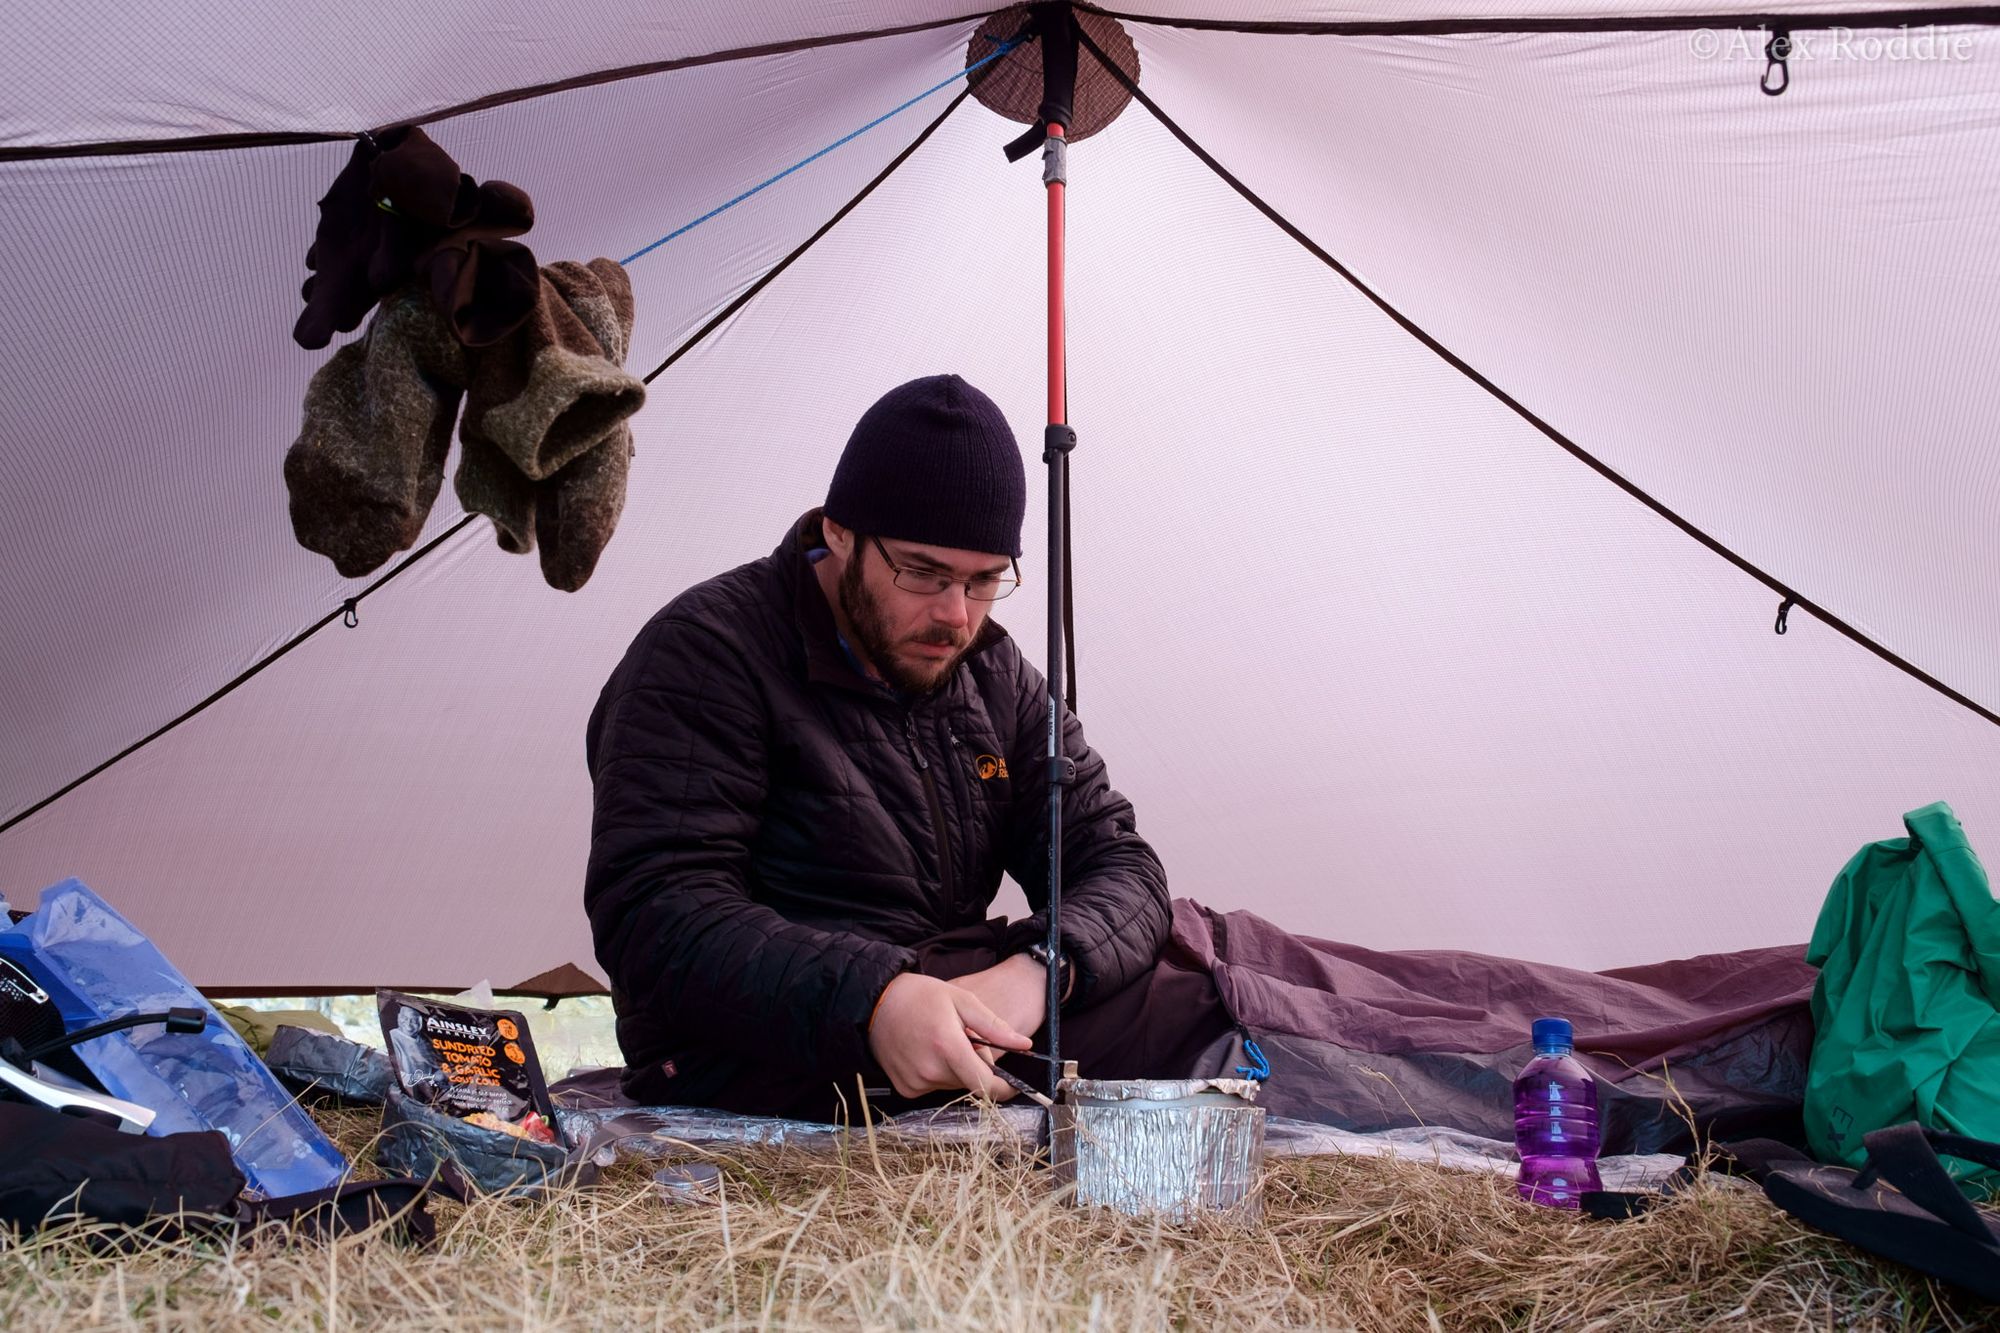
For that trip, I used a polycro groundsheet (in reality, Wickes secondary glazing film cut to size) and a water-resistant bivy bag. The polycro worked extremely well in the dry conditions that month, but I soon realised I didn’t really need the bivy bag. There was rarely any risk of brushing against condensation with my sleeping bag, and the midges hadn’t come out yet.
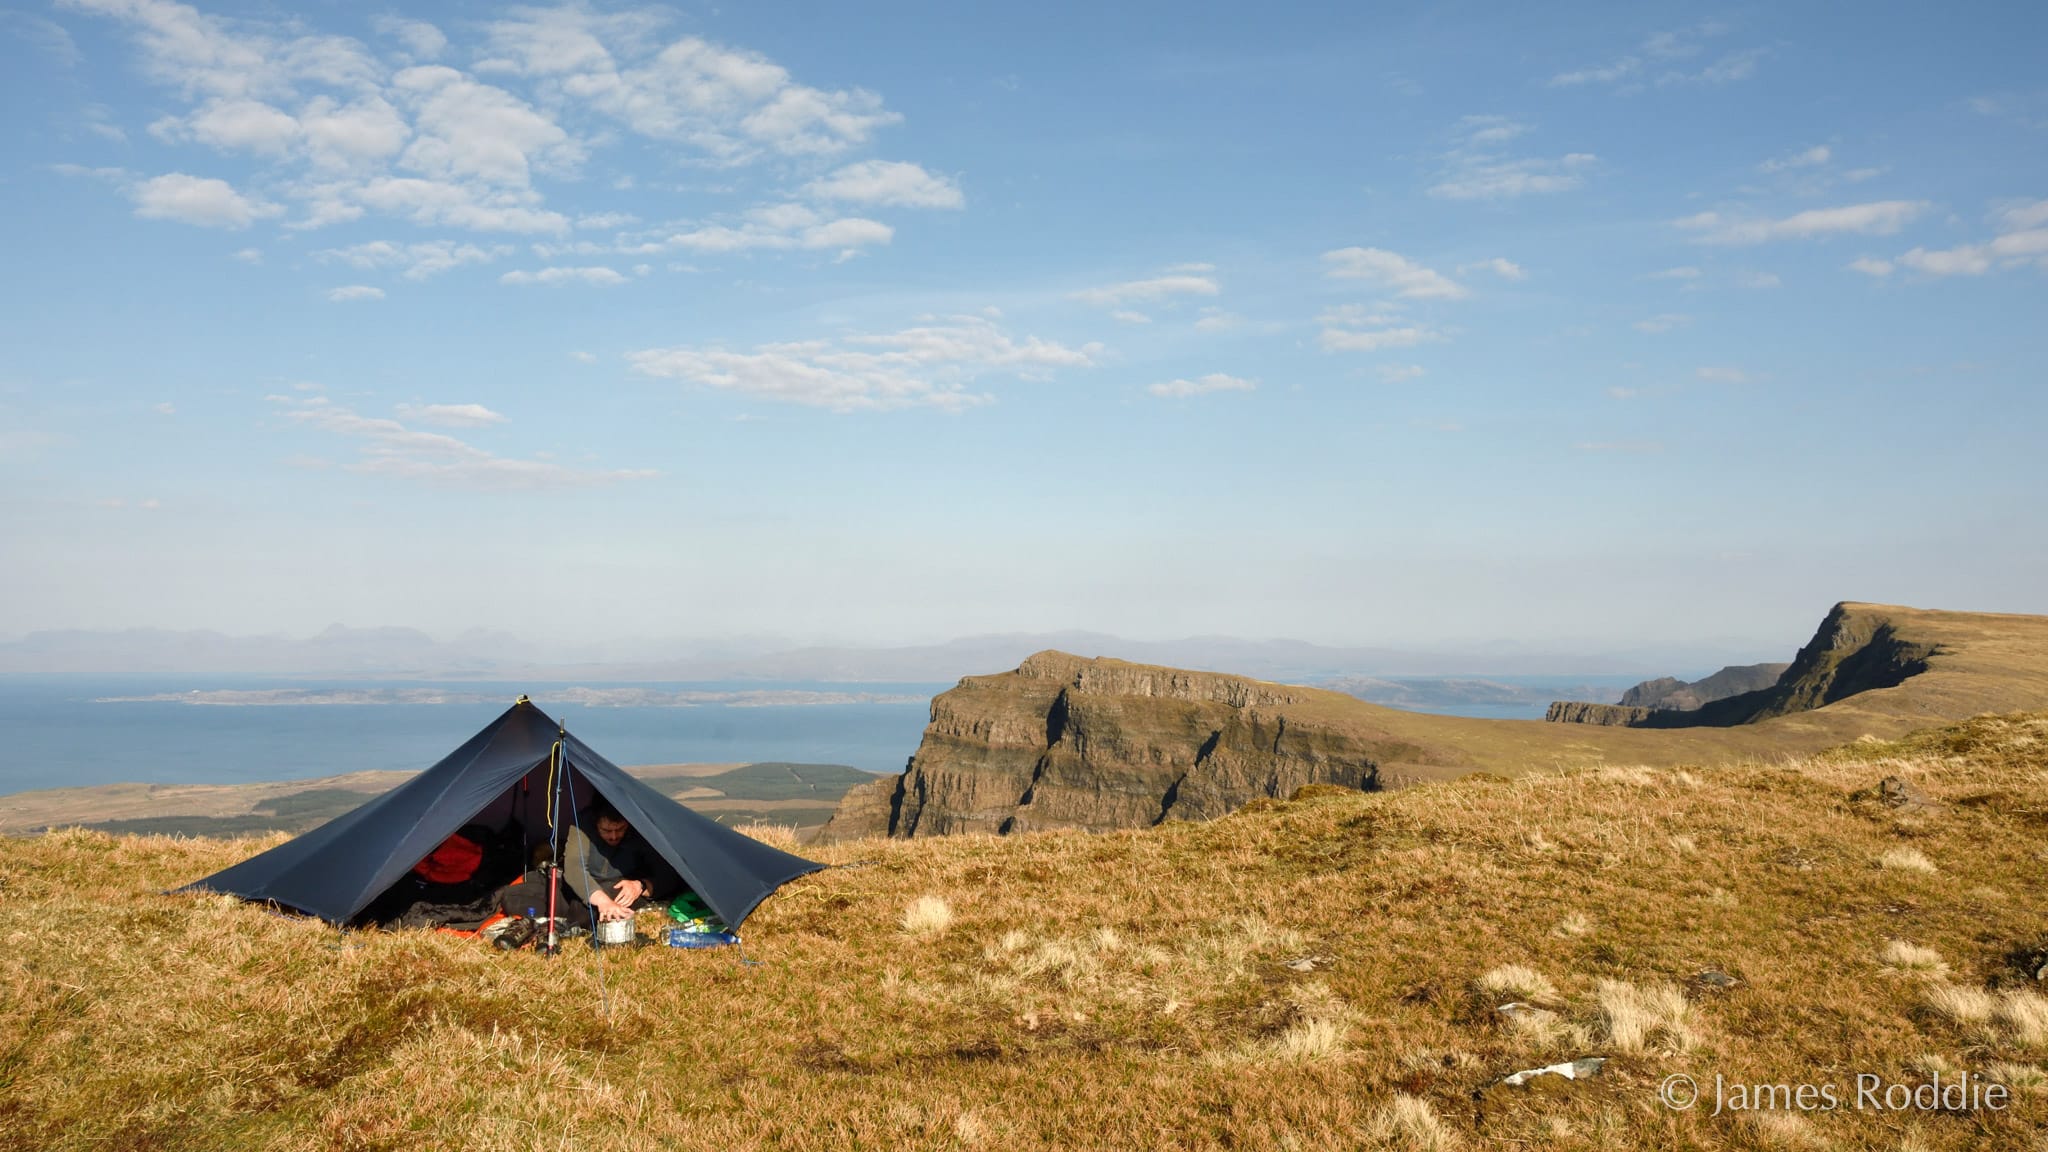
I learned about finding the best place for the Trailstar. Although the footprint is massive, its flexibility means that you can often pitch it over surprisingly large obstacles – rocks, heather clumps, even small bushes – and so long as they are not actually in your sleeping area it will usually be fine. For a single camper, the sleeping area is a fraction of the total area covered by the canopy, so with a bit of practice you can squeeze the Trailstar in to places you wouldn’t have thought it could fit. Unlike an inflexible tent, it adapts to the landscape.
This flexibility extends to its pitching height. The Trailstar relies on the user’s trekking poles for structural support. Pitch it high – usually 120-130cm – and you get excellent ventilation and loads of headroom. Pitch it low – 90-110cm – and there’s a lot less interior space but it will shrug off winds of 50mph+.
I didn’t really put the Trailstar to the test on that first trip. I had some heavy rain and a couple of minor gales, but I never needed to use anything but a 120cm pitch. This has become my standard pitching height for normal weather.
On subsequent trips it has coped with a far wider variety of weather conditions, and I’ve learned a lot about how to get the best from this shelter.
- In extremely high winds, pitch the Trailstar low with as flat an entrance profile as possible to reduce flapping. Use bomber pegs on the corner guys (for example, MSR Groundhogs or Easton Nano nails) and peg out all the mid-panel points as well. Pitched this way, making use of natural shelter if possible, the Trailstar can withstand astonishing winds.
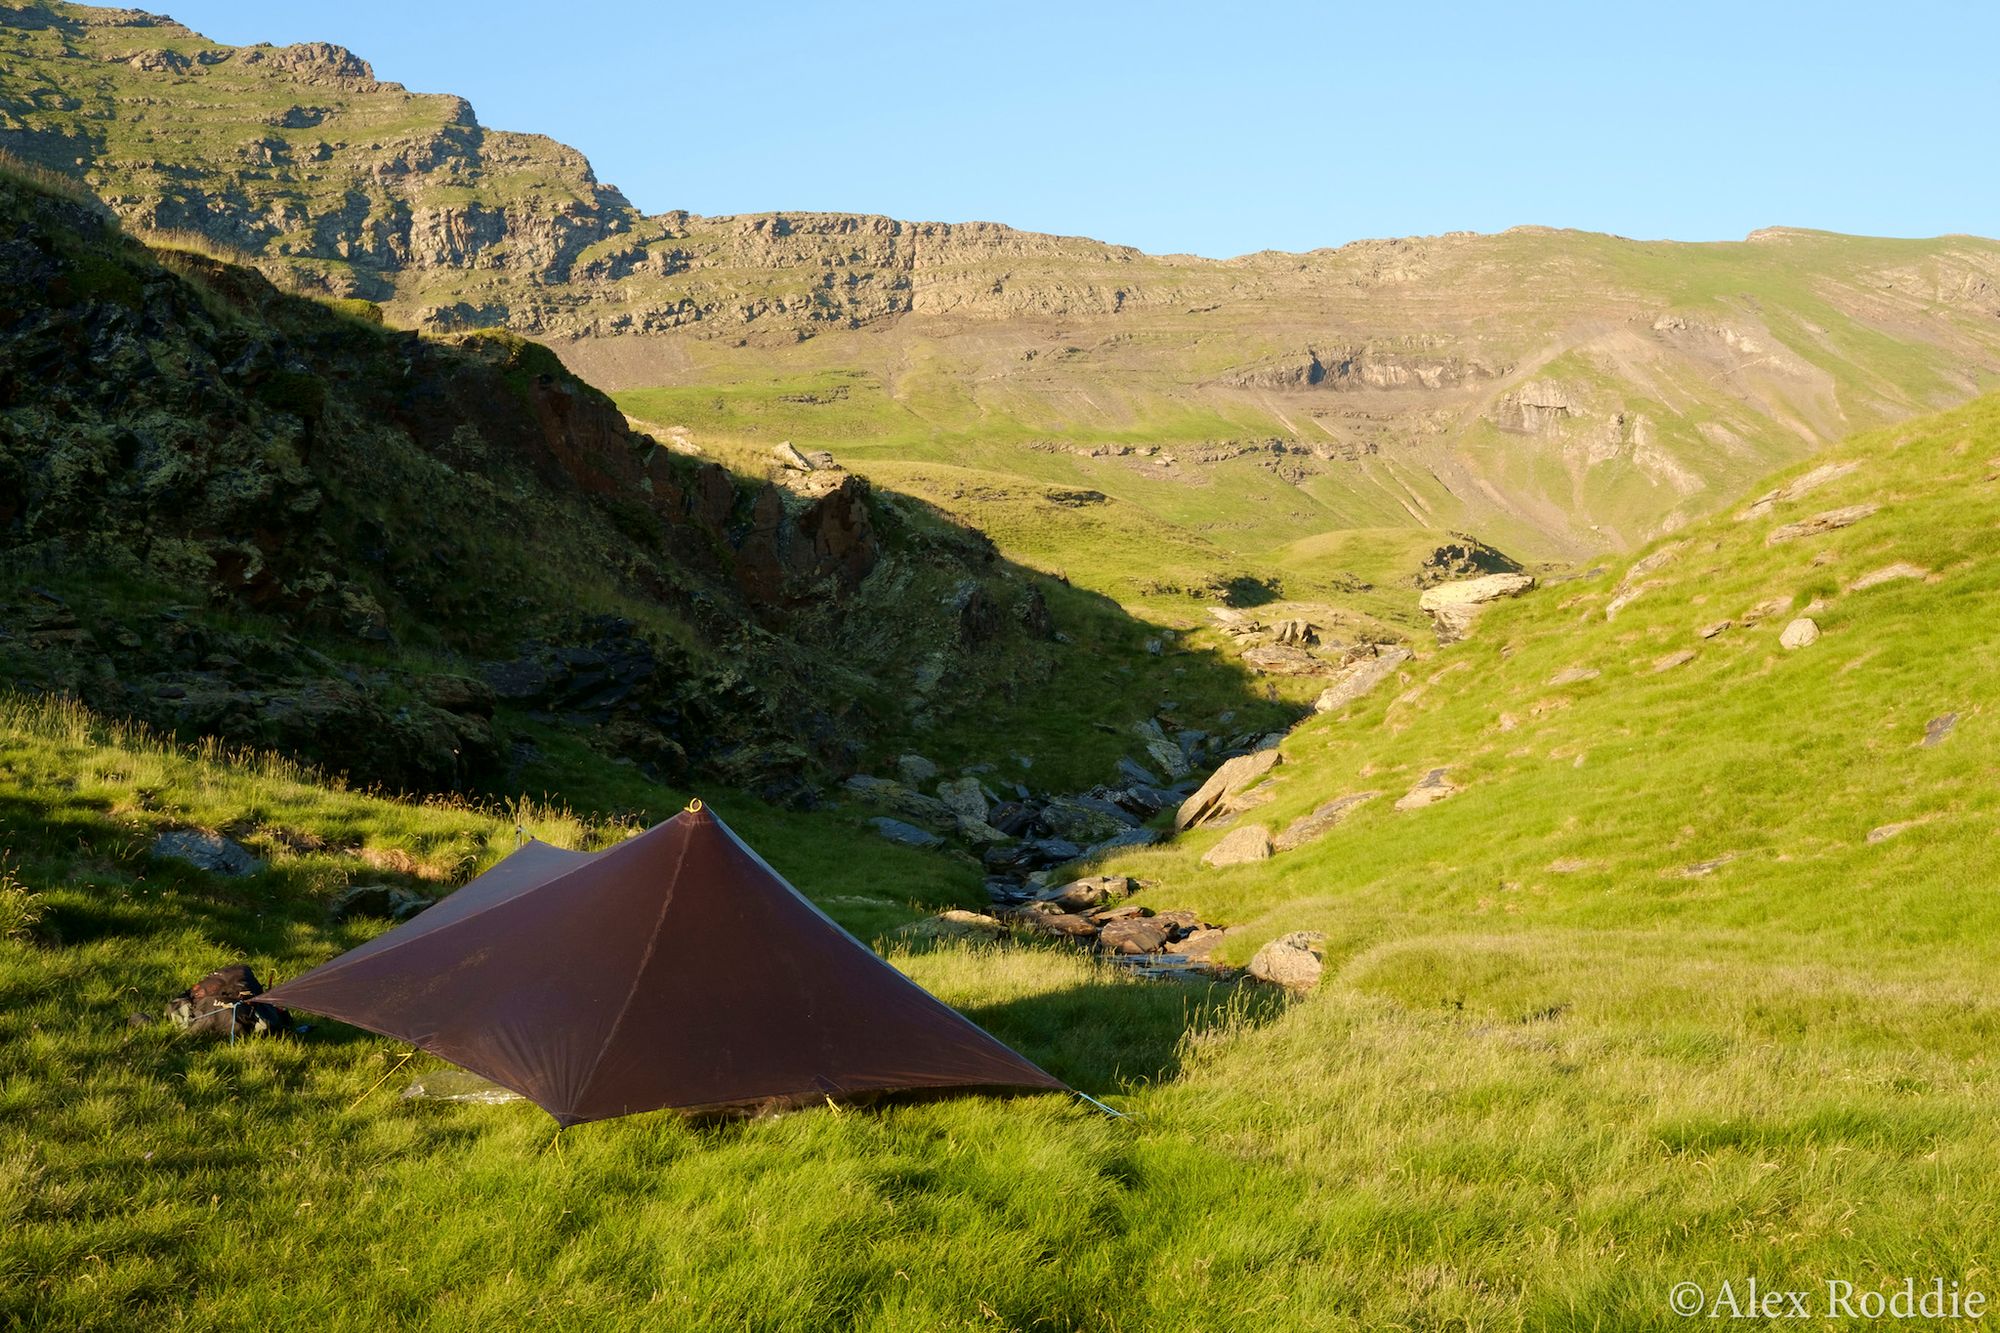
- In heavy rain but low winds, a high pitch is best so you can have as much interior space as possible. Due to the shelter’s size, raindrops bouncing under the flysheet are rarely problematic. Site selection is important in these conditions. Camp in a hollow and you risk flooding your pitch – especially if the ground is hard. A bathtub groundsheet is a handy item to have, and can also be useful for…
- Boggy pitches. When there’s a lot of groundwater (i.e. most of the time in Scotland) I’ve found it helpful to look for grassy knolls, which tend to be a bit drier than lower-lying ground. When it’s really wet, a bathtub groundsheet becomes essential to keep water out of your sleeping area. This can either be a standalone groundsheet like the Oooktub, or integrated with a nest.
- Midges or mosquitos. Site selection can help – camp high or in a breeze and you’ll avoid the worst of the bugs – but I’ve found that the Trailstar can act as a huge trap for flying insects, due to its size. In such conditions you need a physical barrier. A bivy bag works but I often prefer to use a dedicated mesh inner instead. My Oookworks Weenest will fit under any pyramid shelter, and does a superb job of keeping insects away from me. A mesh inner can push the weight of the whole setup beyond that of many standalone tents, but that isn’t really the point: the Trailstar is all about flexibility, not lowest overall weight.
- If you expect spindrift, a full inner with solid walls will keep snow out of your sleeping area, but anything left outside the inner will get buried. In such conditions I think a larger nest is best so you can store your things in a protected area. I haven’t used my Trailstar much in genuine winter conditions yet, as I prefer a fully enclosed shelter during the colder months.
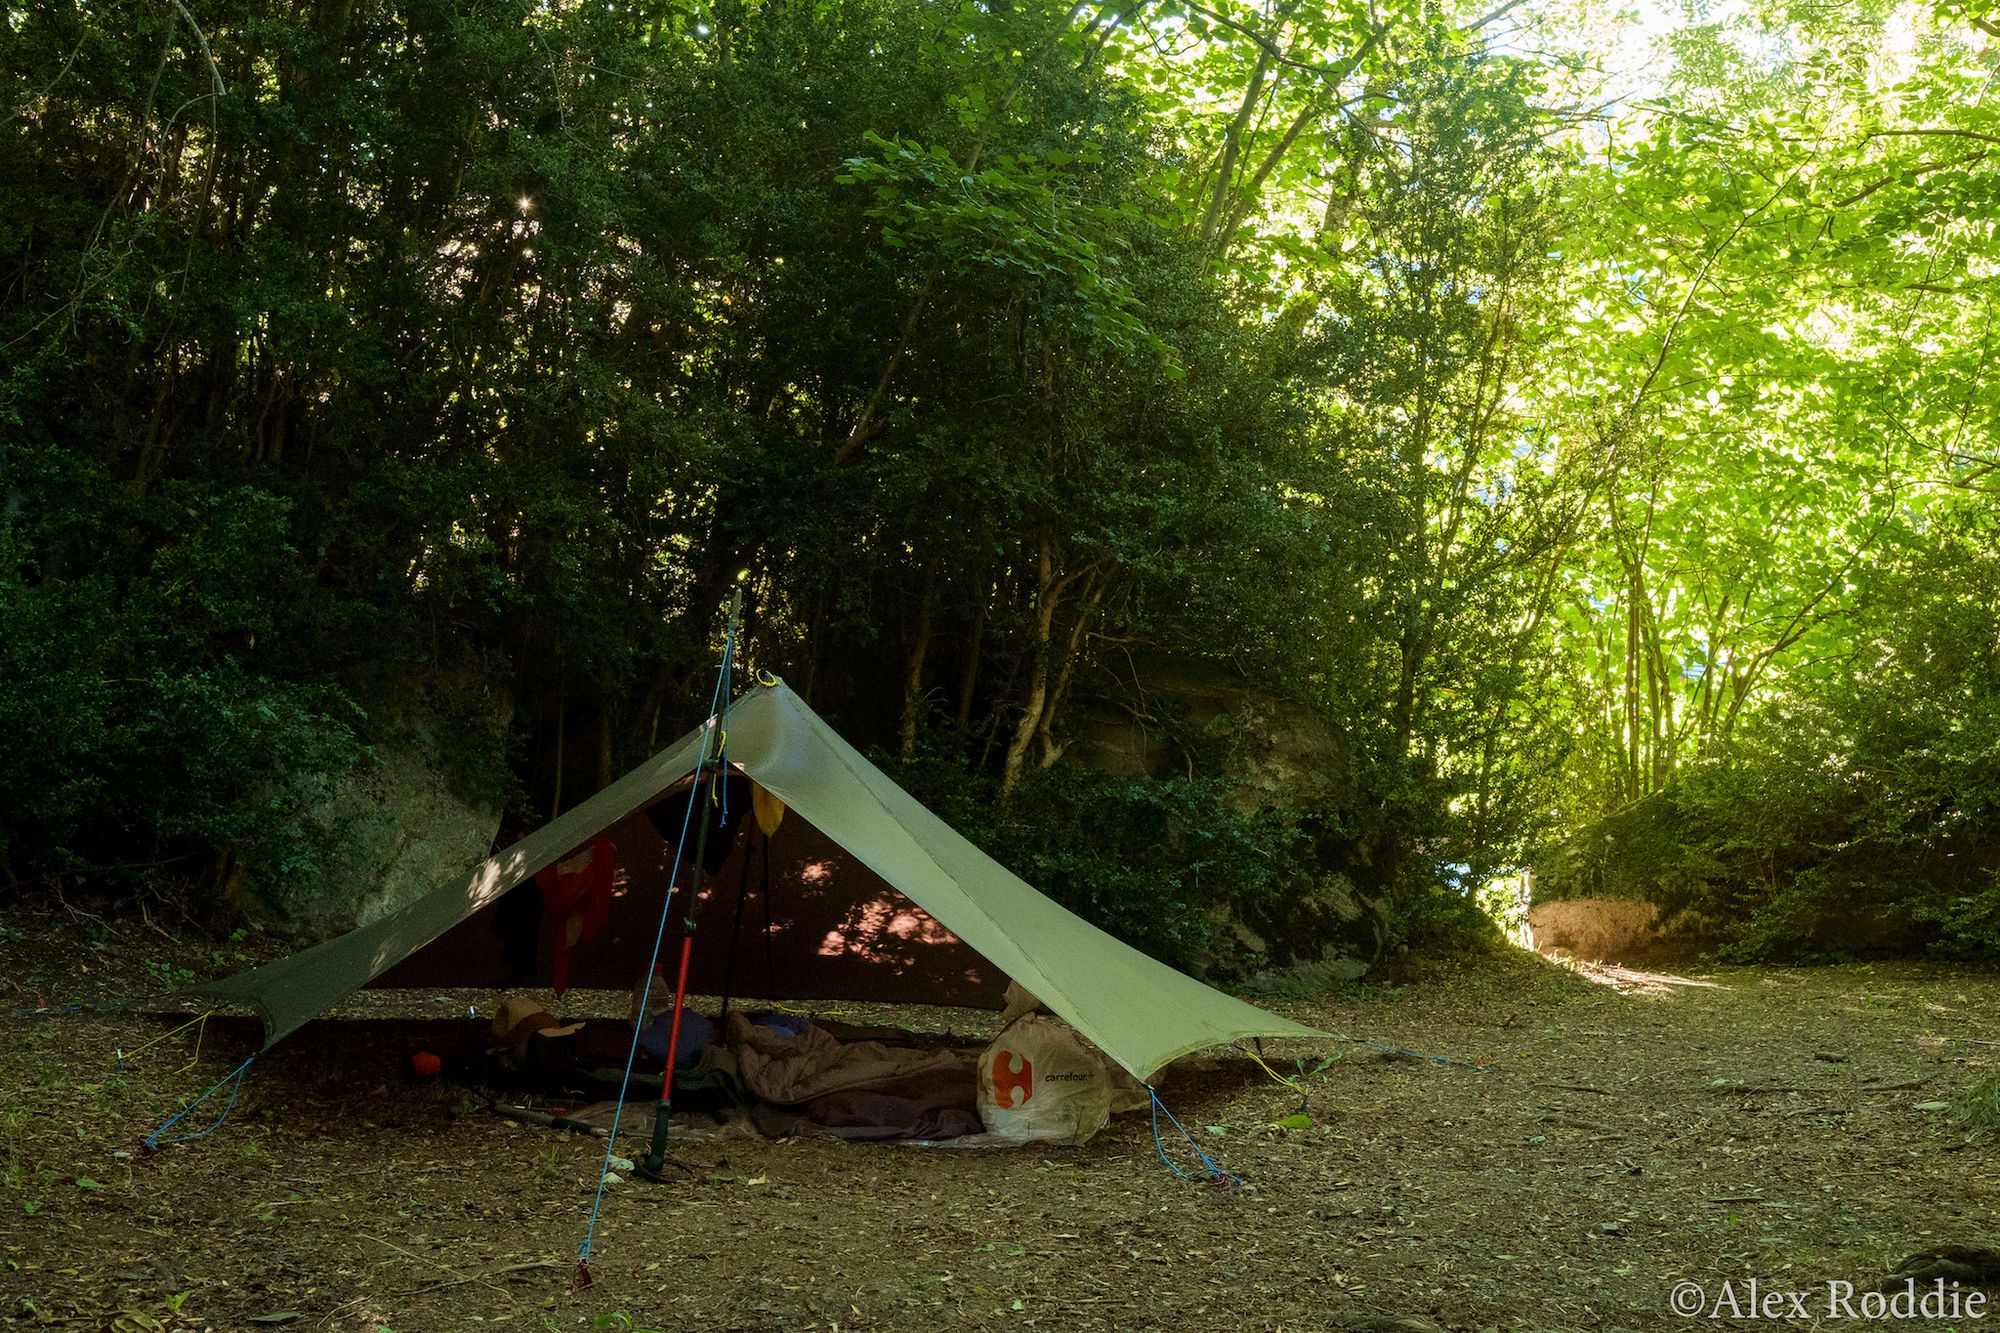
After all this hard use throughout the Highlands, England and Wales, and the Pyrenees, the tarp itself shows no signs of physical wear. No stitching has come undone, there’s no abrasion to the material, and the seam sealing is fine. I did, however, replace the guylines at the start of this season, because a couple of them were looking a bit worn (and I managed to sever one on a recent outing due to poor site selection). Otherwise it’s as good as new, and I expect it to last me for many more years.
Pitfalls
It’s only after extensive use that the imperfections of a shelter this good make themselves apparent.
- I’m not particularly tall, but tall people often don’t get on with the Trailstar. The problem is the shallow angle of the walls, which makes much of the interior volume unusable for anything but storing small items when it’s pitched low. Tall people find themselves brushing against the walls if they sleep behind the centre pole (which is the best place to sleep in bad weather, to keep yourself as far from the entrance as possible).
- Condensation varies. Due to the excellent ventilation, condensation is not as much a problem as it is for many tents, but in certain conditions condensation can get quite bad – especially if the tarp is pitched low. I think the large surface area exacerbates this. As usual, site selection is often key here.
- As already mentioned, the large surface area can gather squadrons of flying insects under it. They tend to mill about in a huge cloud at the peak, unable to escape.
- The final downside of the Trailstar’s size: despite its flexibility when it comes to selecting a pitch, sometimes it’s just too big. Thinking back to trips with the Tarptent Notch, I would have struggled to fit the Trailstar in some of the locations I pitched the Notch, especially in the Alps.
- If you need an inner to cope with bugs or draughts, the weight of the whole setup does add up. Backpackers focused mainly on weight might find it difficult to justify the Trailstar in bug season.
- Privacy can be an issue on commercial campsites. If there are a lot of people about I try to pitch with the entrance facing a wall or hedge. If I’m leaving the site for a while I sometimes peg the entrance to the ground; I’m sure this wouldn’t deter potential thieves, but it makes me feel better!
- No matter how high you pitch it, you’ll always have to stoop or crouch to get in and out of the entrance. This can result in ‘Trailstar knee’ from having to kneel on wet ground, and often your back will get soaked in condensation from the underside of the fly. Tall people will again get the short straw here! It isn’t a big problem, but it can get annoying after a few days, particularly in grotty weather.
- Although the Trailstar is highly resistant to weather from three sides, on a few occasions I’ve had the wind go through 180˚ during the night and start battering the entrance. If this happens, the Trailstar turns into something like a spinnaker sail, and you’ll need to take action. My usual tactic is to drop the entrance pole and peg the entrance directly to the ground, which is ok for a while in moderate winds but the entire structure becomes extremely flappy, and it isn’t a long-term solution. Sometimes you just have to get your shoes on and re-pitch the shelter. This is a problem for all open-sided shelters, not just the Trailstar, and in practice it has only affected me rarely (perhaps three nights out of 60+).
Final words
No shelter is perfect for every scenario. Although the Trailstar is no exception to this rule, it excels like no other tarp in typical British hill conditions where rain and high winds might be encountered for days on end. Its unique flexibility and modular nature make it almost ideal for the three-season British backpacker. I am a committed fan. I don’t take it on every trip (I have a Solomid XL I really like too, and a poncho tarp for benign conditions) but I love using the Trailstar more than any other shelter.
Its downsides can get on my nerves at times. There was one point on my recent extended Scottish trip when I’d pitched the Trailstar very low, and had to crawl through mud to get out. Using my Solomid XL would have solved that problem, but then again the ‘mid wouldn’t have coped as well with the raging winds overnight.
Gear selection in lightweight backpacking is all about selecting the most efficient option from interlocking, often complex trade-offs. After more than a year, if I have chosen to pack the Trailstar in my rucksack, that decision is more than justified when it counts – on the hill.

Disclaimer: this is not a paid review. I paid full price for my Trailstar, and have no relationship with Mountain Laurel Designs. Nevertheless, I’m an advocate for their gear and often recommend it.

Alex Roddie Newsletter
Subscribe here to receive my occasional personal newsletter in your inbox. (For the fun stuff, please consider subscribing to Alpenglow Journal instead!)